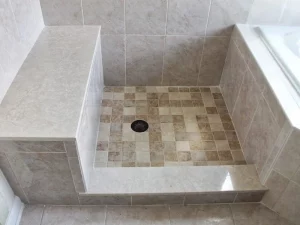
How To Install Tile On A Sloped Floor
This video features a home construction professional named Brad, who provides a tutorial on how to install tile in a commercial bathroom from start to finish. Brad starts by emphasizing the importance of pitching the floor before installing the tile, especially if there’s a drain. He points out that thinset is not an effective agent for pitching since it does not hold its shape well. Brad recommends using a smooth, flat surface and a common consistency of thinset to ensure good adhesion and prevent tile popping.
Next, Brad introduces the product they will be using, Custom Float. He mentions that they will be mixing a lot of it, roughly 30-40 bags for a 300 square foot bathroom, and that they will use aluminum pieces to screen out the Custom Float once it’s down. Brad notes that they will achieve a pitch that goes from the highest point on the wall down to the drain.
On day two, Brad shows a completed wall they set up using plastic for the ledger at the bottom of the floor, which is reusable and doesn’t swell when hit with water. Brad emphasizes the importance of prep work, accuracy, and laser shooting around the room. Once the prep work is done, the installation can proceed quickly since they don’t have to worry about leveling.
Brad then discusses the materials they use, including porcelain 12 by 24 tile, which is less porous than ceramic and provides a more waterproof barrier. He also talks about Schlueter metal edge, a specific product called Smoother Kwatik in a satin nickel finish that provides a nice straight finished edge to the tile.
On day three, Brad and John begin to lay out the floor. John explains the use of a laser contraption to shoot a square line on their longest run, where they pull tiles from both ends of the room and mark them to see how the tiles will fit. They make sure they have the right cuts and dry fit the tiles to see how they’ll look. Brad uses a wet saw to cut tiles, making sure to wear safety goggles, and talks about the importance of using tile spacers to prevent lippage.
After laying the tiles, Brad mixes the grout and explains how they use a rubber float to press the grout into the spaces between the tiles. He also talks about the importance of keeping the area clean as they go, and they use a damp sponge to wipe away excess grout. Finally, Brad talks about how they will seal the grout to prevent moisture from penetrating the grout joints.
In conclusion, Brad provides a comprehensive tutorial on how to install tile in a commercial bathroom from start to finish. He emphasizes the importance of pitching the floor, doing prep work accurately, using the right materials, making cuts, using tile spacers, and sealing the grout to prevent moisture from penetrating the joints. By following Brad’s advice, homeowners or contractors can install tile like a professional and create beautiful, long-lasting bathrooms.

 Previous Post
 Next Post


